• The Roadster Factory Recovery Fund - Friends, as you may have heard, The Roadster Factory, a respected British Car Parts business in PA, suffered a total loss in a fire on Christmas Day. Read about it, discuss or ask questions >> HERE. The Triumph Register of America is sponsoring a fund raiser to help TRF get back on their feet. If you can help, vist >> their GoFundMe page.
  • Hey there Guest!
    If you enjoy BCF and find our forum a useful resource, if you appreciate not having ads pop up all over the place and you want to ensure we can stay online - Please consider supporting with an "optional" low-cost annual subscription.
    **Upgrade Now**
    (PS: Subscribers don't see this UGLY banner)
Tips
Tips

BJ8 boot rubber strip

James A

Freshman Member
Offline
Hi guys,

The rubber boot seal on my BJ8 was incorrectly fitted to the body of the car, instead of the boot itself which I see from pictures is the correct placement.

I am in the middle of the job of gently removing the old glue and rubber from the body of the car which is slow going but seemingly successful!

I have bought a new strip as the old was past it's best.

Does anyone have any advice of what type of adhesive to use and what the correct placement of the rubber is around the boot lid as it is not obvious to me.

Thanks for your help.

James
 

Jack T

Jedi Trainee
Country flag
Offline
James, I've found that 3M Black Super Weatherstrip and Gasket Adhesive works great for rubber seals. When the directions are followed, it holds tight yet allows you some time to work. I would definitely recommend removing the boot lid from the car to do the job properly. I just kept the seal tight to the edges all the way around. Have a rag or paper towels and mineral spirits handy to clean off the 'stringers' that get on the paint.
 
Country flag
Offline
The best adhesive, in my experience, is 3M Super Weatherstrip Adhesive:

https://www.zoro.com/3m-super-weatherstrip-adhesive-8008/i/G0605701/?gclid=CIKM3c6t-dECFYhufgod4yQJAg

(this is the black version of the famous 'gorilla snot')

The best adhesive remover, again in my experience, is 3M Adhesive Remover:

https://www.amazon.com/3M-General-P...486311604&sr=8-2&keywords=3m+adhesive+remover

(the remover isn't available in California, so you know it's good ;) and, no, I don't work for 3M but find their products usually work well)

As for installation, AFAIK, the groove should face down, with the smaller lip on the inside. I always put the joint/seam--whatever you call where the two ends meet--at the very bottom of the lid, but I think I read somewhere the factory put them on the side.
 

BJ8Healeys

Jedi Warrior
Country flag
Offline
My technique only works if you're agile enough to get into the boot and close the lid (it helps to have the fuel tank removed), or have someone small enough to do it for you, but this is how I did it and it saves a lot of trial and error:
Temporarily secure (at intervals, with masking tape) the new seal to the flange of the rear shroud that it mates with. I don't know where the factory put the ends of the seal, but having it at the bottom makes the most sense to me. Get into the boot with a flashlight and pencil, have someone close the lid. Check to make sure that the seal is fitting properly all around the shroud flange with no gaps. Mark the inner edge of the seal all around the inner surface of the boot lid with the pencil.
Now you know where the inner edge of the seal should be, so you can get out of the boot. Remove the tape and work your way around the seal with adhesive (I agree about the 3M Weatherstrip Adhesive -- and adhesive remover if necessary), using the pencil mark as a guide.
 

CLEAH

Jedi Warrior
Country flag
Offline
One of the last places I would want to find myself is in the boot of a BJ8. Well, maybe a Sprite boot would be worse!
 

Keoke

Great Pumpkin
Country flag
Offline
One of the last places I would want to find myself is in the boot of a BJ8. Well, maybe a Sprite boot would be worse!

Yeah and I feel the last place I would want the boot seal ends to join is at the bottom where all the water collets
 

BJ8Healeys

Jedi Warrior
Country flag
Offline
Yeah and I feel the last place I would want the boot seal ends to join is at the bottom where all the water collets

If the seal is installed properly so that it seals all around the rear shroud flange of the boot opening, then the lower edge of the seal is at least a half inch above the low point of the drain channel. And the butt ends are also sealed with the weatherstrip adhesive. Any water that collects in the channel here is going to run out the first time you accelerate. However, the argument could also be made that if the butt ends are sealed correctly, then it doesn't matter where the butt is located.
 

steveg

Yoda
Gold
Country flag
Offline
Got my seal installed on the dining-room table, using 3M Black Weatherstrip adhesive. $12.49 vs $12.99 for the Super version (couldn't find any difference on the packaging).
For cleanup, I used Bestine Thinner and Solvent, available at art supply stores (California, too):

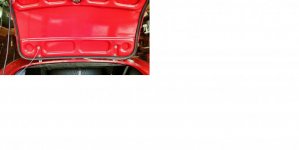
BootLid_orig.jpg
screenshot.933.jpg
 

Attachments

  • BootLid_2.jpg
    BootLid_2.jpg
    21 KB · Views: 60
Last edited:
Country flag
Offline
The 3M General Purpose Adhesive Remover, formulated to remove 3M adhesives--and others--works pretty good on 3M adhesives as well. Can't buy it, at least off-the-shelf, in California though (so you know it's good).
 

HealeyRick

Yoda
Silver
Country flag
Offline
I used Bestine Thinner and Solvent, available at art supply stores:

View attachment 50104

Boy, does this stuff bring back memories. In years gone by when I was a newspaper reporter in the pre word-processor stories, you'd edit your copy and change the order of paragraphs by cutting them out and pasting them on a different sheet of paper. Every reporter had a pot of rubber glue on their desk that would invariably harden up and you'd pour the Bestine in the pot to thin it out. Of course, everyone smoked so it's amazing the whole newsroom didn't explode as the stuff wafted through the air.
 
Similar threads
Thread starter Title Forum Replies Date
S Securing the jack with strap in BJ8 boot Austin Healey 11
S Boot Liner - BJ8 Austin Healey 19
R Boot hinge support brackets for BJ8 MKIII Austin Healey 4
60TR3A BJ7/BJ8 Boot Cover Question Austin Healey 15
J BJ8 rear boot floor replacement. Austin Healey 9
F BJ8 Exhaust Hanger Pictures Wanted Austin Healey 9
Patrick67BJ8 Custom BJ8 Dash Switch Panel Austin Healey 7
1 BJ8 History Trace Austin Healey 7
Patrick67BJ8 Wanted Looking for a used BJ8 switch panel. Austin Healey Classifieds 5
D BJ8 Top Installation Detail Austin Healey 3
B BJ8 Rear Backrest Hinges Austin Healey 4
S Wanted WTB: 3.5 ratio diff/pumkin for '67 BJ8 Healey 3000 Austin Healey Classifieds 0
AUSMHLY BJ8 Trans Cover Carpet Austin Healey 7
nitro BJ8 Engine Design Austin Healey 1
AUSMHLY BJ8 Carpet and Snaps Austin Healey 2
Overdrive45 BJ8 Interior Trim Austin Healey 8
nitro BJ8 Production Year Austin Healey 6
WHT BJ8 Rear Seat Surround Drain Tube Grommets Austin Healey 0
B BJ8 Seat Sliders Austin Healey 4
B For Sale 1967 Metallic Golden Beige MKIII BJ8 Numbers Matching - The Real Deal Austin Healey Classifieds 0
F Wanted BJ8 Engine Block Austin Healey Classifieds 1
BoyRacer For Sale BJ8 disk wheel hubs, spindles & calipers Austin Healey Classifieds 0
AUSMHLY BJ8 Rear Seat Squab Austin Healey 0
AUSMHLY BJ8 Differential Oil Change Austin Healey 6
S SOLD!! For Sale 1964 AH 3000 MkIII BJ8 Phase 1 Austin Healey Classifieds 2
Patrick67BJ8 BJ8 Factory Hardtop Rear Window Austin Healey 6
AUSMHLY BJ8 Clutch Pressure Plate, Old vs New Austin Healey 4
AUSMHLY BJ8 Clutch Fork Bush Replacement Austin Healey 5
AUSMHLY BJ8 Cylinder Head Installation Austin Healey 6
LAW75 BJ8 Brake Lines Austin Healey 2
AUSMHLY BJ8 Clutch Pressure Plate Brand Preferences Austin Healey 3
BoyRacer For Sale BJ8 spindles & disc wheel hubs Austin Healey Classifieds 0
G Wanted BJ8 Tonneau Cover Austin Healey Classifieds 0
Cutrog1 For Sale Healey 3000 BJ8.... a restoration saga Austin Healey Classifieds 0
AUSMHLY BJ8 Overdrive Oil Passages Austin Healey 2
Scotsman Wiring Diagram for 1966 BJ8 Austin Healey 3
A For Sale 1966 3000 Healey Blue BJ8 Austin Healey Classifieds 3
S BJ8 Front Side Lamp/Turn Signals Austin Healey 1
B BJ7/BJ8 Door Check Straps Austin Healey 10
B BJ8 Hood Bow and Seal Austin Healey 5
Mickey Richaud Wanted Wanted: BJ8 Seat Track Sets (Both Sides) Austin Healey Classifieds 5
Scotsman BJ8 Intake Manifold Differences Austin Healey 4
AUSMHLY Laygear End Float BN1-BJ8 Austin Healey 2
C For Sale BJ8 original dash Austin Healey Classifieds 3
LarryK BJ8 Parts or Project Car For Sale in St. Louis Austin Healey 3
Patrick67BJ8 BJ8 Intake manifold Booster & Vacuum Hookup threads sizes. Austin Healey 2
B BJ8 Centre Console Chrome Strips Austin Healey 5
B Wanted Chrome strips centre console BJ8 Austin Healey Classifieds 0
AUSMHLY BJ8 Cylinder Head Re-Torque Austin Healey 26
AUSMHLY BJ8 Transmission Gasket Austin Healey 0

Similar threads

Top